2025-03-27 08:32:58
6.2k
588
Phone Stand | Vantage Collection

@ERAVIA_3338673
Donate
Message
Follow
Recommended printing method
Add
Plain | 0.16mm Layer, 3 Walls, 20% Infill
Kobra 3
Kobra 2
、
Kobra S1
、
Kobra 4
、
Kobra X
、
Kobra 3 V2
、
Kobra 3 Max
、
Kobra 2 Max
、
Kobra 2 Pro
、
Kobra 2 Neo
、
Kobra 2 Plus
/ Plates:8
/ 5h37m
Hex | 0.16mm Layer, 3 Walls, 20% Infill
Kobra 3
Kobra 2
、
Kobra S1
、
Kobra 4
、
Kobra X
、
Kobra 3 V2
、
Kobra 3 Max
、
Kobra 2 Max
、
Kobra 2 Pro
、
Kobra 2 Neo
、
Kobra 2 Plus
/ Plates:8
/ 6h32m
Plain | 0.16mm Layer, 3 Walls, 20% Infill
Kobra 3
Kobra 2
、
Kobra S1
、
Kobra 4
、
Kobra X
、
Kobra 3 V2
、
Kobra 3 Max
、
Kobra 2 Max
、
Kobra 2 Pro
、
Kobra 2 Neo
、
Kobra 2 Plus
/ Plates:8
/ 7h13m
166
Share


Description
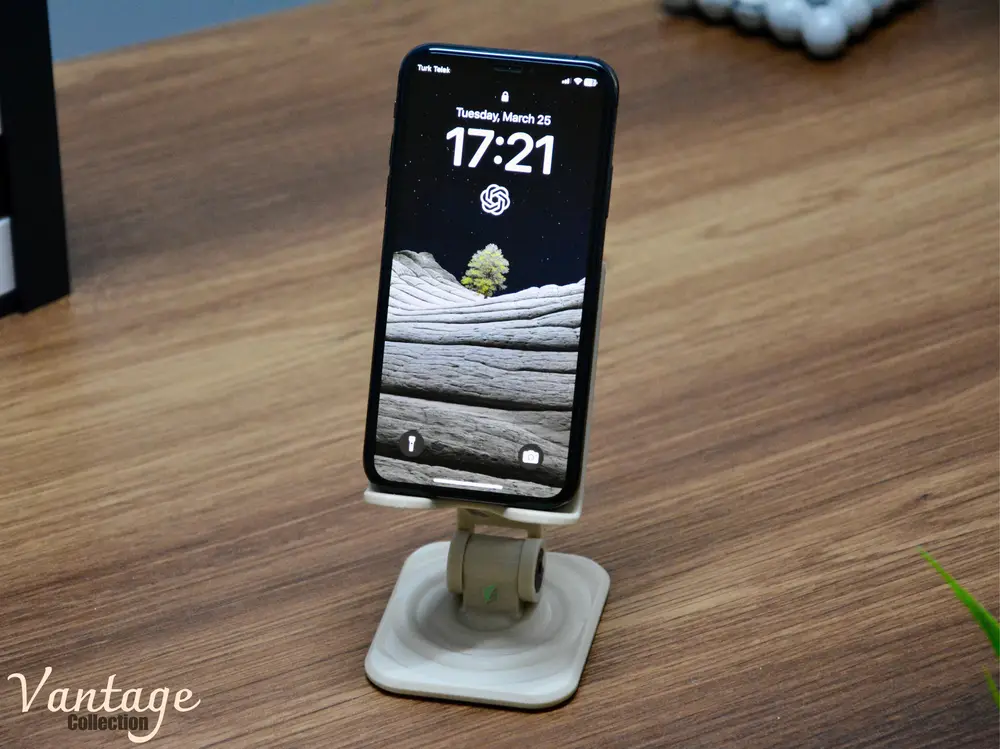
VANTAGE PHONE STAND
A Sleek, Adjustable, and Ergonomic Stand for Phones
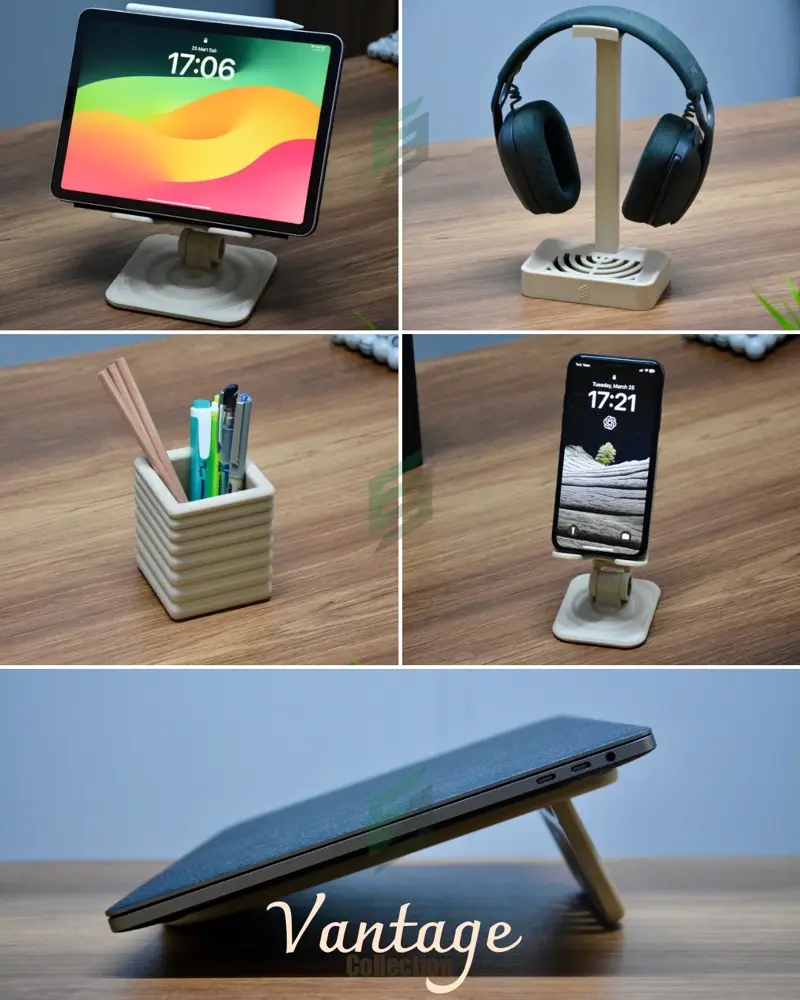
Customizable and Modular Design with Interchangeable and Extendable Components
Available in Three Distinct Styles to Complement Any Workspace: Ripple, Hex, and Plain Versions
Print Instructions & Recommendations
- It is recommended to use 0.16mm layer height and 3 walls. Especially the layer height is critical to achieve precise and more detailed surface patterns.
- No support is required for printing any parts except for the Ripple Base with the current orientation. Ripple Base can be printed with its bottom facing the surface, but the layer lines will be visible. To eliminate this, the published print profile has been adjusted to optimize the print orientation and remove visible layer lines.
- All parts of the model are fully compatible with each other, allowing to mix and match the base, arm, and holder from different styles to create preferred combination.
- Each print profile includes all parts for the specific version, but not all parts need to be printed. Only one of the locking caps (tightness) should be selected, as there are multiple options. The rest of the parts can be printed as preferred.
- The adjustable feature relies on the friction between the arm, base, and holder. To optimize the movement, four different locking caps are provided with varying diameters to either increase or decrease friction, allowing users to find the optimum balance for smooth movement and stability. Based on the experience from prototype testing, the following caps are recommended:
- PLA Basic ~ Tight caps
- PLA Wood ~ Extra tight caps
- PLA Matte ~ Normal caps
- Note #1: Do not use PLA Matte for printing the arm, as it breaks easily. It can be used for the rest of the model.
- Note #2: There are engravings on each cap to indicate its type (I, II, III, and IV) where higher the number, tighter the fitment.
Assembly Instructions
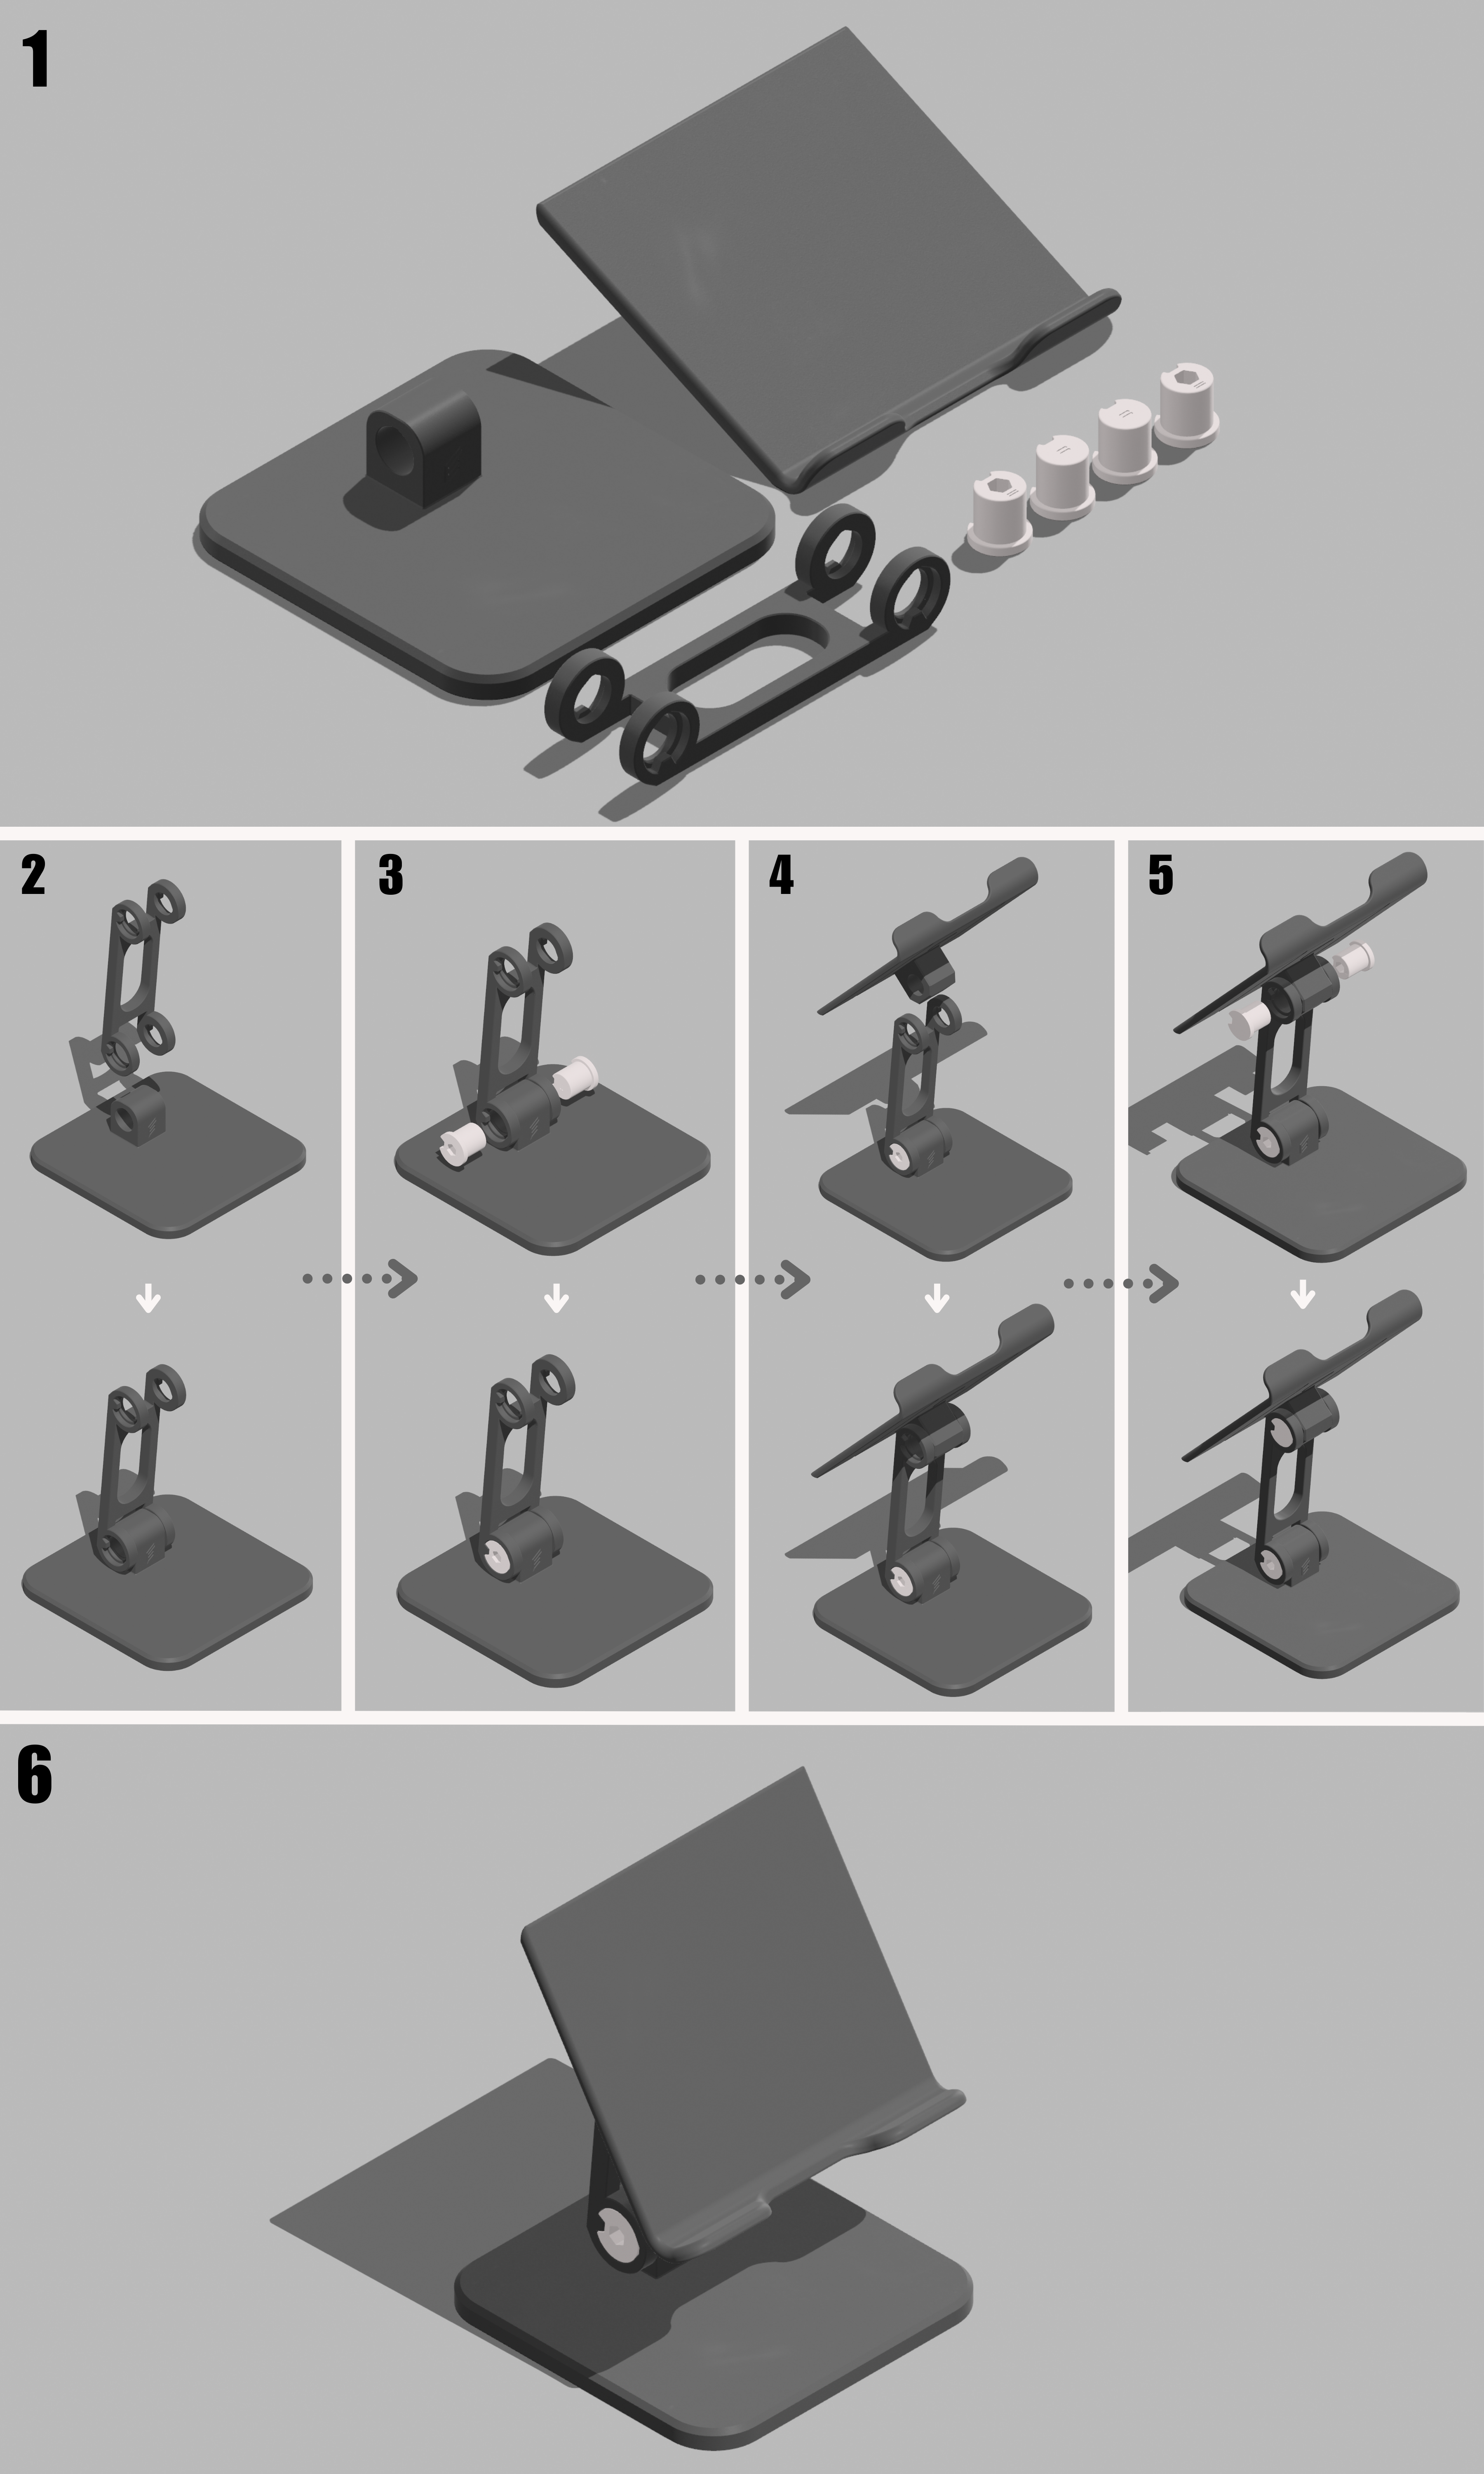
- Assembly requires no additional tools, materials or post-processing.
- Each hinge location uses two caps pressed from each side to lock. One of these caps has a hollow in the center, allowing for easy removal if necessary. Be careful not to lock two caps with no holes in the same hinge, as it will make removal impossible without damaging the parts.
- Assembly steps are identical to the "Vantage Tablet Stand" as shown below:
Model Information
- Dimensions (X-Y-Z) | Assembled: 70 x 85 x 135 mm
- Dimensions (X-Y-Z) | Assembled ~ Extended: 70 x 85 x 210 mm
- Commercial Use: Terms and conditions are available on Patreon.
Vantage Collection
Tags
License
Standard Digital File License
This work is licensed under the Standard Digital File License.
You are prohibited from sharing, sub-licensing, selling, renting, hosting, transferring, or distributing the digital file or 3D printed versions of this object, as well as any other derivative work in either digital or physical form (including remixes).You are not allowed to use the objects in any manner that involves charging money or collecting fees without permission.
You are prohibited from sharing, sub-licensing, selling, renting, hosting, transferring, or distributing the digital file or 3D printed versions of this object, as well as any other derivative work in either digital or physical form (including remixes).You are not allowed to use the objects in any manner that involves charging money or collecting fees without permission.